Featured Product
Fly Tying Magnifier
Illuminated magnifier used for fly tying to see thread placement more precisely on hook shank
"first thing I want to do is thank my wife Lisa and my son Kyle for buying me this handy dandy fly time magnifier... I think it helps me tie much clean..."
The Dirty Water Solution: Tying the Half and Half Glo Spawn for Steelhead
Every steelhead angler knows the frustration of arriving at a river only to find it running chocolate brown after a heavy rain. Visibility drops to a few inches, and the carefully tied egg patterns that worked so beautifully last weekend suddenly seem invisible to fish hugging the bottom. It's in these challenging moments that having the right fly in your box — tied in the right colors — can mean the difference between a productive day and a long, cold walk back to the truck.
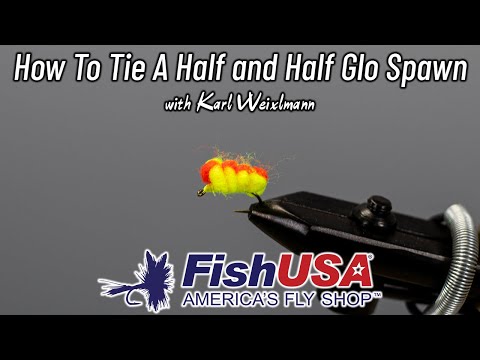
In this guide, we break down how to tie one of the most effective dirty water steelhead flies in a fly fisher's arsenal: the Half and Half Glo Spawn. Demonstrated in a FishUSA fly tying video, this pattern uses a color combination the tier calls the best you can use for dirty water.
Know Your Conditions: Why Dirty Water Demands a Different Fly
Water clarity changes everything. In really dirty water, with six or eight inches of visibility, fish need a big, bright egg pattern they can actually see.
"Sometimes when we're steelhead fishing we come across really, really dirty water conditions — six inches of visibility, eight inches of visibility. Real tough conditions. So we need a big, bright egg pattern that fish can see in those types of water conditions."
This is the philosophy behind the Half and Half Glo Spawn: a fly purpose-built for the worst conditions a steelhead river can throw at you.
Mentioned in This Article
Size 10 Egg Hook
Size 10 egg hooks used for tying dirty water steelhead egg patterns like sucker spawn and glow spawn
The Color Combination: A Lesson from the Classics
The color sequence used in this pattern isn't accidental or arbitrary. The tier first learned this color combination in John Nagy's first book, which used it on a half-and-half glow bug. Glow bugs in these colors work great too, he says, but they have a practical limitation.
"A glow bug is dense, it's heavy, it's opaque. It doesn't sink as fast as a sucker spawn style tie."
So the tier adapted that color combination to a sucker spawn tying style — creating what he calls the Glo Spawn. The result is a fly that carries all the visual punch of the original color scheme while sinking faster and presenting a more lifelike, flowing profile in the water.
The color pairing itself is deceptively simple but remarkably effective: chartreuse on both sides, with flame glow bug yarn running through the center.
Materials and Hook Selection
Getting the right materials together before you sit down at the vise is half the battle. For the Half and Half Glo Spawn, you'll keep the material list refreshingly short — but every component has been chosen with purpose.
What You'll Need
Hook: Size 10 egg hook. The step up in hook size from standard egg patterns is intentional. A larger hook allows for a bigger, more imposing fly profile — critical when you need fish to detect your offering from a distance in poor visibility. A longer shank also gives you the real estate to build a full, four-loop profile without crowding the eye.
Yarn: Two strands of chartreuse glow bug yarn and one strand of flame glow bug yarn. These three strands are combined into a single bundle that forms the body of the fly. The flame runs centrally between the two chartreuse strands.
Thread: Standard fly tying thread to match or complement your materials. The tier works the thread from behind the hook eye all the way back to the bend, establishing a clean, even base before the yarn is applied.
Head Cement or Nail Polish: Applied to the finished head for durability. A well-finished head keeps the thread wraps from unraveling and extends the life of a pattern that may see heavy use during tough-water seasons.
One helpful tool worth mentioning: the tier credits a fly tying magnifier — a gift from his wife Lisa and son Kyle — as a genuine game-changer at the bench. He says it helps him tie cleaner, more precise flies.
Mentioned in This Article
Chartreuse Glo Bug Yarn
Chartreuse egg tying material used for the sides of the dirty water glow spawn pattern
Building the Strand Bundle
Before thread ever touches the hook, the first task is assembling your three-strand yarn bundle. This preparatory step is more important than it might initially seem — how tightly and evenly you construct the bundle directly affects how cleanly the fly will tie in and how symmetrically the finished profile will sit on the hook.
Take two strands of chartreuse glow bug yarn and one strand of flame. Position the flame strand between the two chartreuse strands, then twist all three together firmly. The twisting action consolidates the fibers, thinning the bundle slightly and ensuring it binds down evenly on the hook shank without bulk or inconsistency.
"Chartreuse on both sides of the flame — put them together, clip off the top, set that down for a sec."
Using scissors rather than fingers to manipulate the strands during this process helps keep things tidy, particularly when the fibers start to cross or tangle. Take the time to get a clean, well-twisted bundle before moving to the vise — it pays dividends in the finished fly.
Thread Foundation and Yarn Placement
With your hook secured in the vise, start your thread just behind the hook eye and wind smoothly rearward to a point just in front of where the bend begins. This thread base gives the yarn something to grip and helps prevent the material from rolling on the hook shank during tying. Give the thread wraps a light trim to keep the underbody clean before proceeding.
Lay the three-strand bundle on top of the hook shank, positioning it so that material extends both behind the eye and toward the rear of the hook. The goal is to leave clear, unobstructed space just behind the eye — a detail that matters more than beginners might expect. A cluttered hook eye creates headaches when you're streamside, fumbling to thread your leader through in cold, wet conditions.
"I want that material behind the eye of the hook, so I'm going to use a little bit of a wider loop just to get it started down — but I want to leave space just behind the eye of the hook so I can finish off the fly, keep it clean, keep it neat."
Begin binding the material down with thread wraps, working forward to just behind the eye and then back toward the bend. The first loop establishes the foundation; subsequent loops build the profile.
Mentioned in This Article
Flame Glo Bug Yarn
Flame colored glow bug yarn used as the center strand in the dirty water half and half glow spawn pattern
The Four-Loop Technique: Building a Big, Bright Profile
Here is where the Half and Half Glo Spawn earns its dirty water credentials. Where a standard sucker spawn pattern might be finished with two or three loops of material, the dirty water version calls for four full loops — a deliberate choice to maximize the fly's visual profile in low-visibility conditions.
The technique follows a consistent rhythm: bring the material forward, push it back, bring the thread over and bind it down. Repeat. With each loop, the profile grows wider and fuller. Between loops, re-twist the material bundle to keep the fibers consolidated — a critical step that the tier returns to repeatedly throughout the tying process.
"I like to take that and spin it, make it tight. If you spin it, it kind of tightens up the material, makes it thinner so it binds down on the hook better."
Four loops on a size 10 hook produces a generous, rounded profile that pushes water and catches the eye of a steelhead even when that fish can barely see past its nose. Don't rush this stage — take the time to position each loop cleanly and ensure the flame core remains visible through the center of the fly as the profile builds.
Finishing the Fly: Clean Head, Solid Finish
Once all four loops are in place and you're satisfied with the profile, it's time to lock everything down and finish the fly cleanly. Bring the remaining material forward toward the eye, wet the fibers slightly to consolidate them, and give the bundle a final twist before making your trim cut. Wetting the material makes it easier to cut cleanly.
Bind down any remaining material tightly just behind the hook eye, making sure your wraps stay in the small zone between the front of the yarn body and the back of the eye. Complete with a whip finish or several half hitches, then apply a drop of head cement or clear nail polish to the thread wraps at the head.
"Put a little head cement on the front of that if you want, use a little nail polish — do whatever you want. That's a nice big wide profile."
Step back and evaluate the finished fly from multiple angles. The profile should be full and symmetrical, the flame core should be visible through the chartreuse flanks, and the hook eye should be completely clear.
Mentioned in This Article
Fly Tying Head Cement
Head cement used to finish and secure the fly head after tying
On the Water
The tier doesn't say this fly won't work in clear water, but dirty water is where it shines. He pairs it with the three-loop Pink Lady, his all-around clear water egg.
"I normally fish these in dirty water, size 10. That's my number one go-to dirty water egg fly."